

This page is a place-holder for a chronicle of a Borg-Warner (now Tremec) World-Class T5 transmission rebuild. Information will be added in the coming months. Updates will be provided as the rebuild progresses.
This is not a step by step guide, but it does cover some of the key parts of the rebuild process and sensible upgrades to make along the way.
Apologies to readers who were following the rebuild progress on this site, as I've not kept this up-to-date with my progress. I've been criticised for not being able to complete the rebuild of the T5 transmission as some deemed it "too difficult", when in-fact it's simply that I have not had time to update the information on this site.
- Matt
Phase 1 - Research
I did lots of research before finally deciding how and when to convert my 1968 Ford Mustang from Auto to Manual. The superb 3-speed C4 rebuilt for me by Newbury Transmissions (with a few tweaks) was superb but I'd always wanted to own and drive a manual car, call it personal preference. It didn't take me long to come across Modern Driveline, who seem to have a well earned reputation. I was also fortunate enough to know a fellow UK enthusiast who'd used them before and he didn't have a bad word to say. With this in mind I contacted Bruce Couture (the owner) and he personally dealt with my order and any queries I had.
I chose to source a T5 locally in order to save a few pennies and within a few weeks one came up, which another local Mustang club member collected for me (thanks Twin Turbo).
Identifying a "World Class" T5
There's some superb information provided on Paul Cangialosi's website 5speeds.com which provides a detailed guide to identifying a T5 transmission. There's also more information and identification charts on the Rosehill Performance website and the BritishV8.org website.
The tag on the T5 I bought locally from a fellow UK Mustang owner showed 1352-169 which decodes as a 1986 Ford Mustang/Capri V8 "World Class" T5 with 0.68 5th (overdrive) ratio and has a factory rated 265 ft/lb torque capacity.
Below is a useful YouTube video which has been put together by the guys at AutoRestoMod which might be quite useful, if trawling through online references is not your bag. If you want to skip the adverts, the good stuff starts 2:00 minutes in.
I'm not affiliated with these guys, but their videos could be useful to other car guys. They also have a good YouTube channel which you may find interesting.
There's also an excellent article written by the guys at Ford Muscle "Swing Shift - Rebuilding the T5 for 500 lb-ft capability" which is a good step-by-step guide, although you will need to subscribe to see the whole article.
Sensible Upgrades
Input Shaft Bearing Retainer
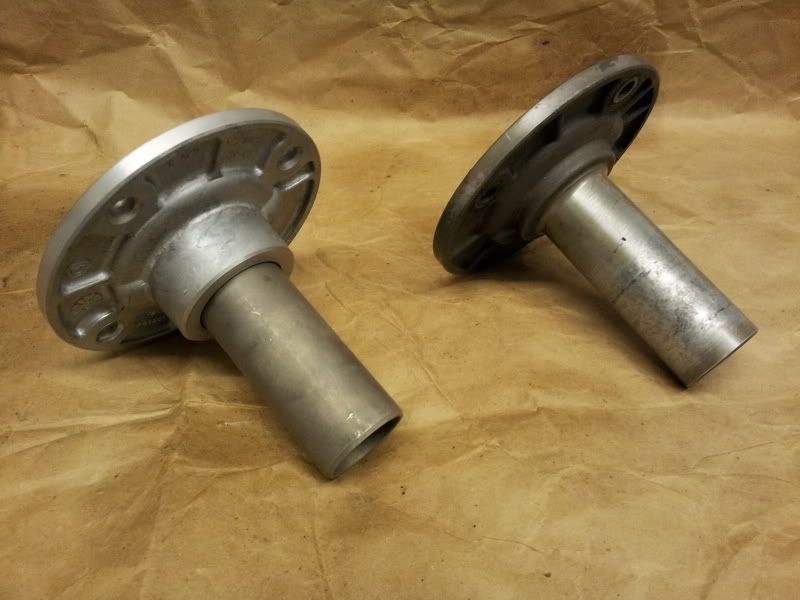
The original aluminium input shaft bearing retainers are known to gaul as a result of the clutch release bearing wearing on them. Stronger replacement iron or steel versions eliminate this problem and are readily available from suppliers such as Modern Driveline, Mustangs Unlimited and NPD. It's worth nothing that these parts are usually listed under the 1979-1993 "fox body" Mustang parts section.
Here's an image showing wear on the old aluminium front bearing retainer (right) and a new replacement (left) with a superior steel tube...
Shifter Mechanism
Many experts feel that the stock T-5 shifter is a poor design, as it which allows over-shifting (which can result in shift fork and gear damage). Also they're not known for being precise due to their poor geometry and rubber isolator, so upgrading to an aftermarket shifter is recommended modification.
Counter-Gear Rear Bearing Stabiliser
The last aftermarket modification (ignoring aftermarket gearsets, shift forks and cases etc.) is to upgrade the weak stamped steel rear counter gear bearing race retainer. The stock item is known to flex under heavy load allowing the cluster gear to to move around within the case, potentially resulting in case damage or failure. Some aftermarket companies offer aluminium replacements or "stabilisers", while others sell steel versions. If you're serious about performance I'd recommend the steel versions as they're obviously stronger.
More information can be found here on Paul Cangialosi's - 5speeds.com website, or within his book.
Phase 2 - Rebuild kit and uprated parts
Here's the pile of parts I received within the rebuild kit supplied by Modern Driveline along with the McLeod "Slik Stick" shifter and later steel input shaft bearing retainer.
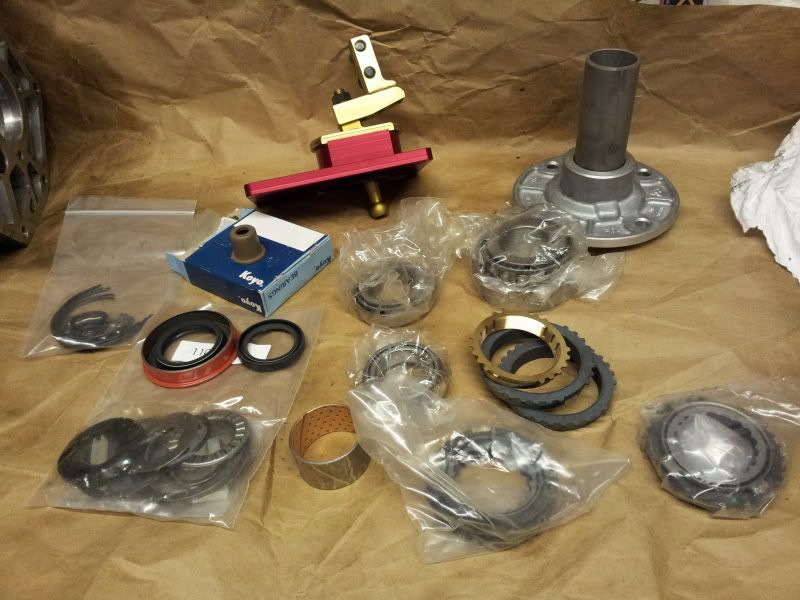
The parts list included the following items...
- Tail-housing output bush/bearing
- Tail-housing oil seal
- McLeod "Slik Stick" shifter
- Shifter bush
- Replacement (steel) input shaft bearing retainer
- Input shaft oil seal
- Input shaft bearing shims
- Input shaft bearing and race (tapered roller type)
- Input shaft to main-shaft bearing needle rollers (15x)
- Input shaft to main-shaft bearing thrust washer (some early T5s didn't have this item installed from the factory)
- Input shaft flat-needle roller bearing
- Main drive thrust washer
- Input shaft bearing and race (tapered roller type)
- Output shaft bearing and race (tapered roller type)
- Front counter (or cluster) gear bearing, cup and O-ring (tapered roller type)
- Front counter (or cluster) gear bearing and race (tapered roller type)
- Synchroniser springs (4x large, 2x small)
- Synchro Rings (2x three-piece, 2x large, 1x small)
- Syncrho Hub Inserts (6x large, 2x small)
- Shift fork wear pads (6x)
- Snap rings (2x)
- Second gear synchro ring spiral clip
- O-rings (3x)
- Thrust/Spacer washers
- 5th-Reverse arm retaining clip
- Speedomater drive gear (replacement to match rear-end ratio of 3.25:1)
It has been incorrectly assumed by posters on internet forums that I was unable to complete the rebuild of the Borg Warner T5 because they believed (incorrectly) that it was too difficult and complex to rebuild a T5 yourself.
This is not true and while I understand the assumption due to this page not being kept up-to-date, I completed all of the work required to rebuild the T5 myself back in 2012. So in answer to those forum posters: Read on...
** Further information added 24/12/2013 **
Phase 3 - Tear-down and inspection
Before tearing down the transmission, you should decide if you have both the necessary skills and access to the required tools. Unlike the older 1965 4-Speed Toploader transmission I rebuilt (chronicle elsewhere on this website), the Borg Warner T5 gearbox does require the use of a workshop press to remove some of the bearings without damaging the components.
Secondly, the T5 transmission is a very precise instrument with narrower tolerances and is more prone to damage if you're heavy handed with it, particularly the aluminium castings. If you're still undeterred I'd suggest obtaining a good exploded diagram and a copy of the T5 rebuild manual, which you can find here: Tremec T5 Maintenance and Service Manual (PDF)
Here's another useful YouTube video which has been put together by the guys at AutoRestoMod. If you want to skip the adverts, the good stuff starts at 01:40.
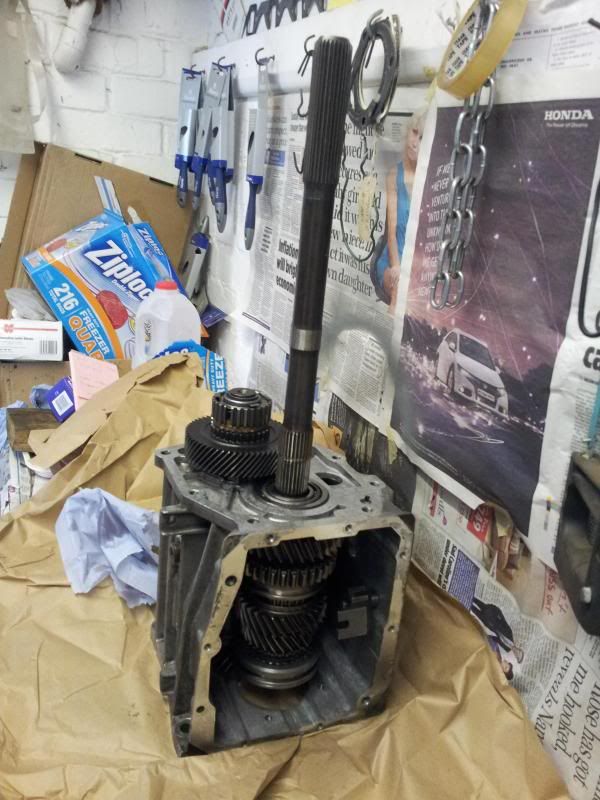
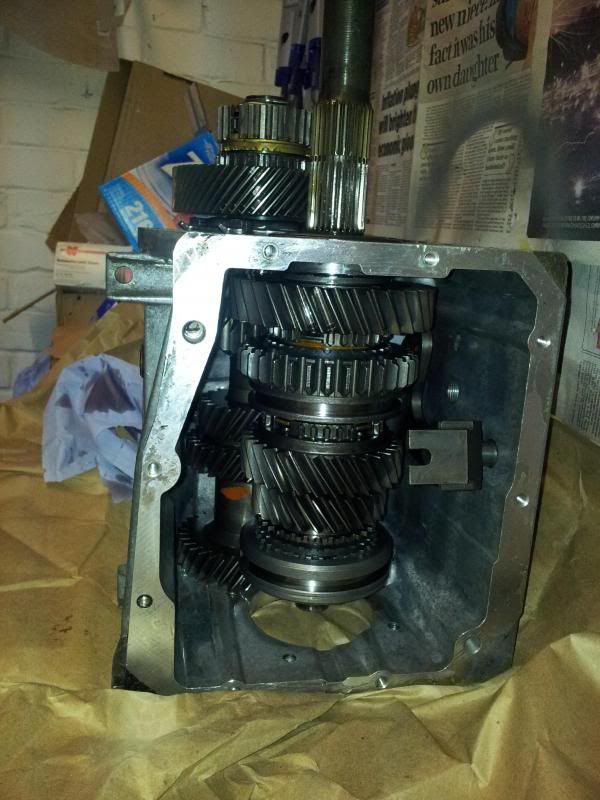
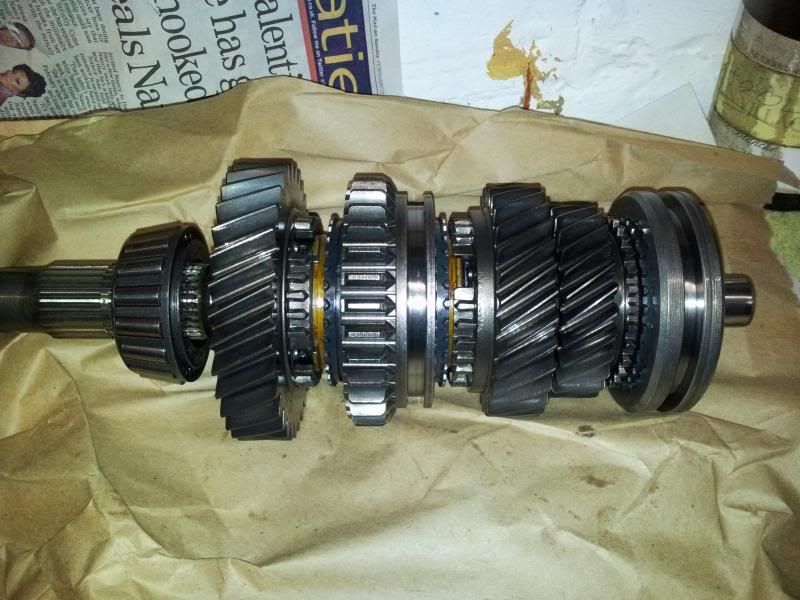
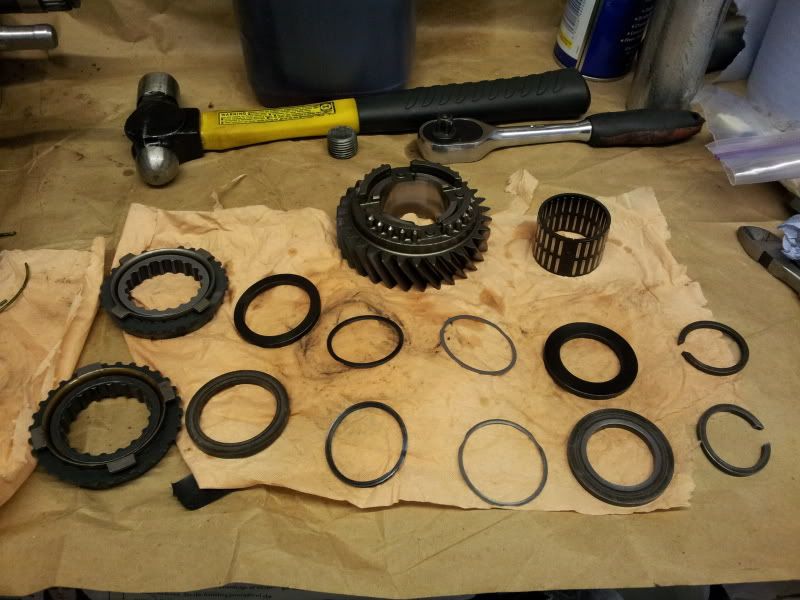
Below are a few pictures from the tear-down of my World-Class T5 transmission, tag code 1352-169.
First impressions showed no major damage on any of the components, which is the sign of a healthy transmission. Given that this unit was originally built in 1986 (according to the date codes etc) its seemed to have been relatively well maintained.
 |
 |
 |
 |
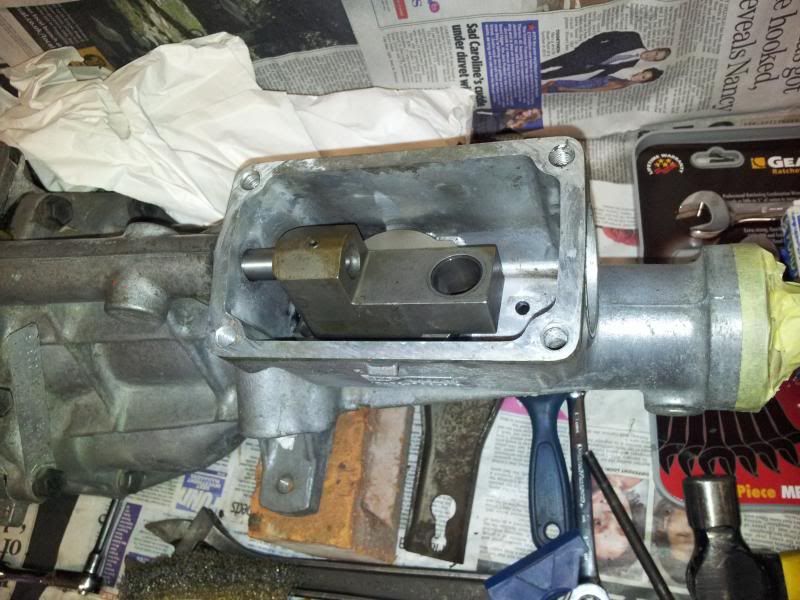
Take care when removing the roll-pin from the 5th gear shift fork and rod. Be sure to support the fork to prevent bending the rod.
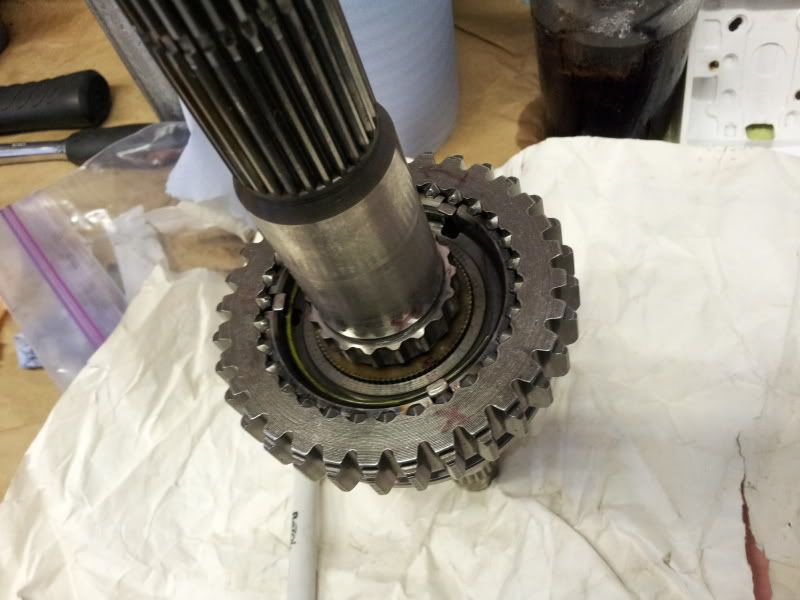
Below are couple of pictures showing the shift 5th drive gear, shift rod and fork removed.
 |
 |
 |
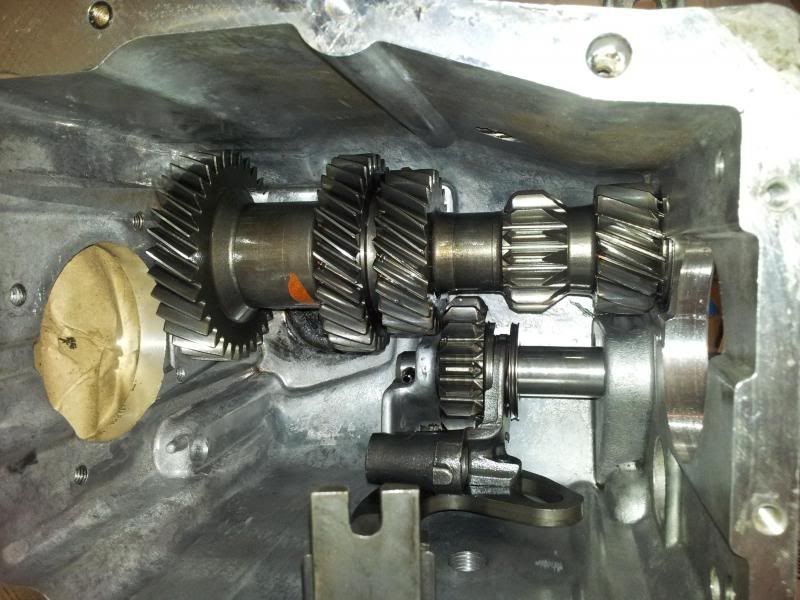 |
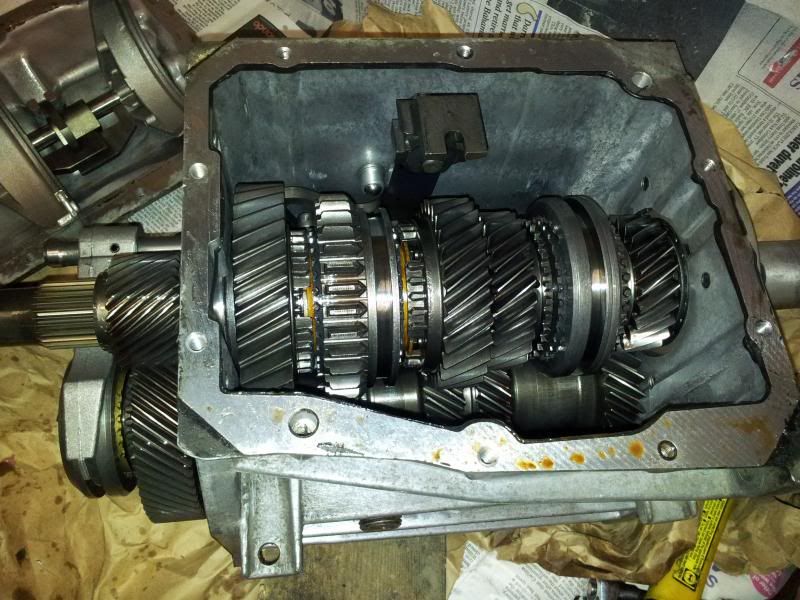
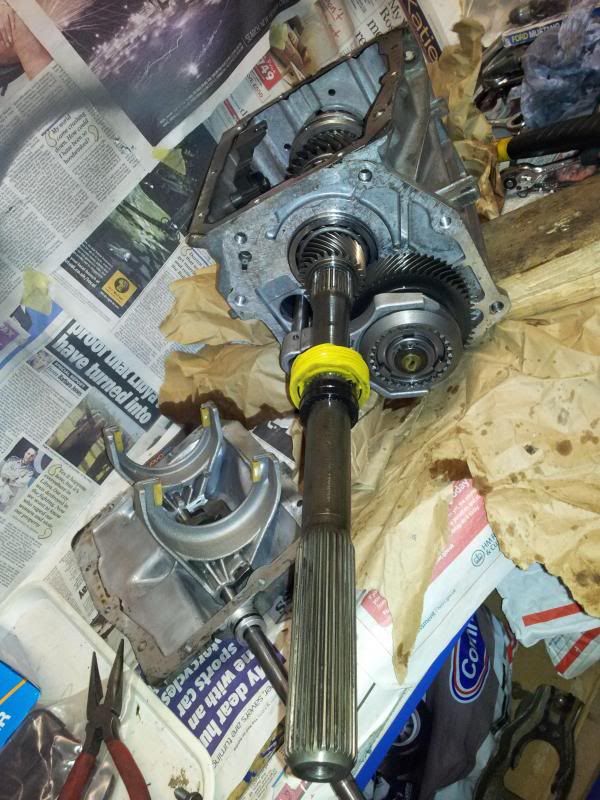
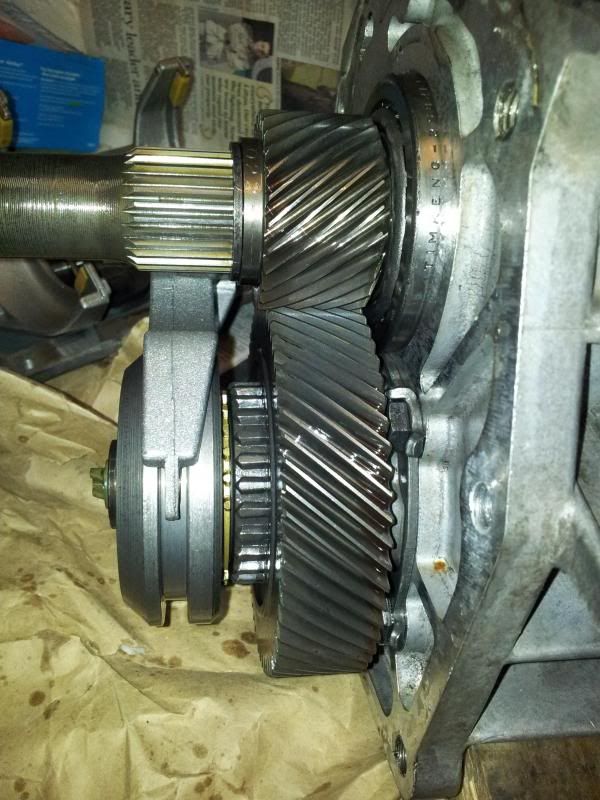
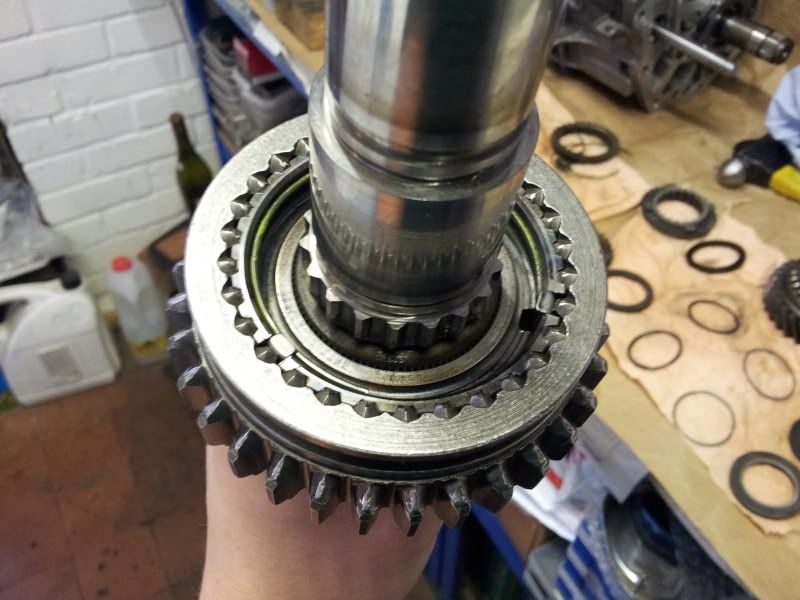
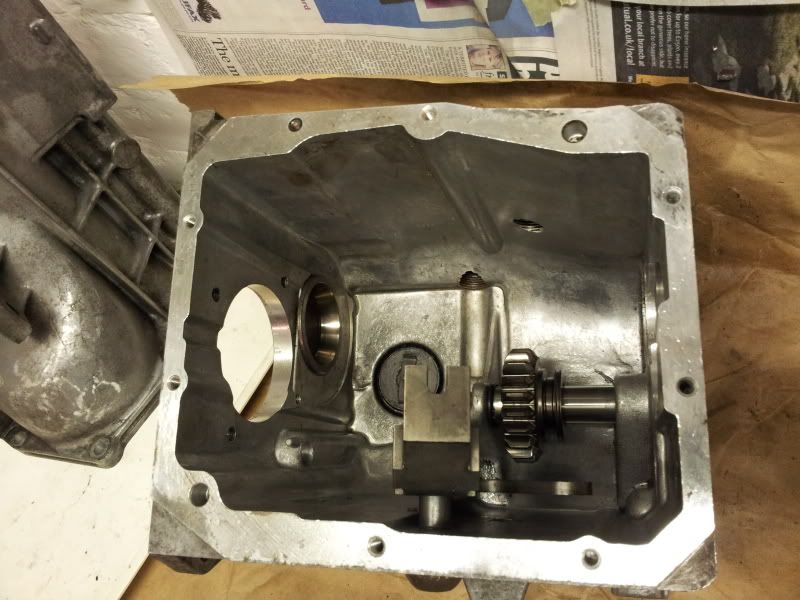
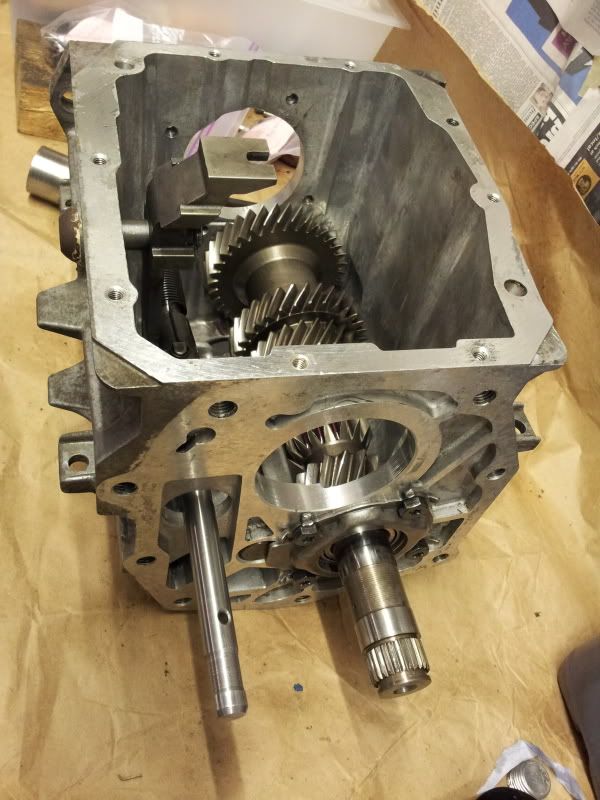
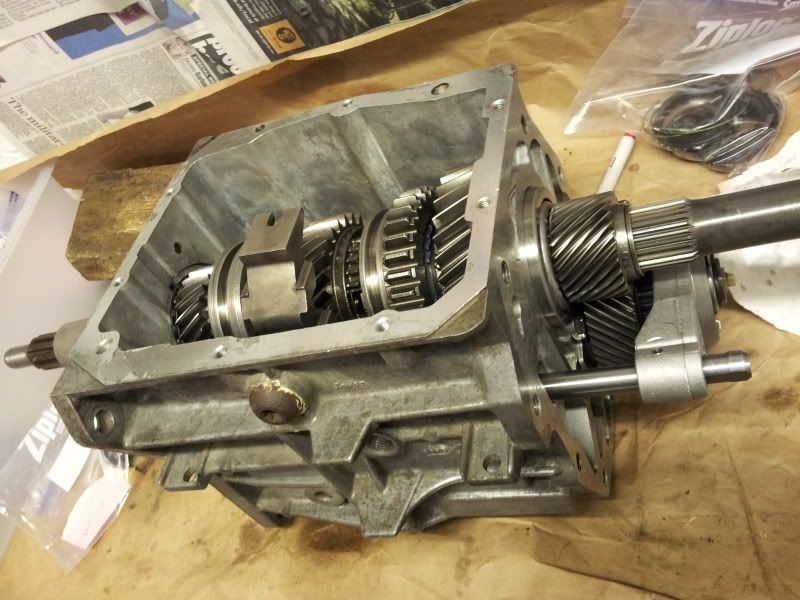
The output shaft removed from the transmission case, ready for further disassembly and inspection. Peering back into the main case you can see the cluster-gear (or counter gear as it's sometimes known), along with the reverse idler and reverse lever.
The next step is to remove the counter-gear and rear bearing for a full inspection.
 |
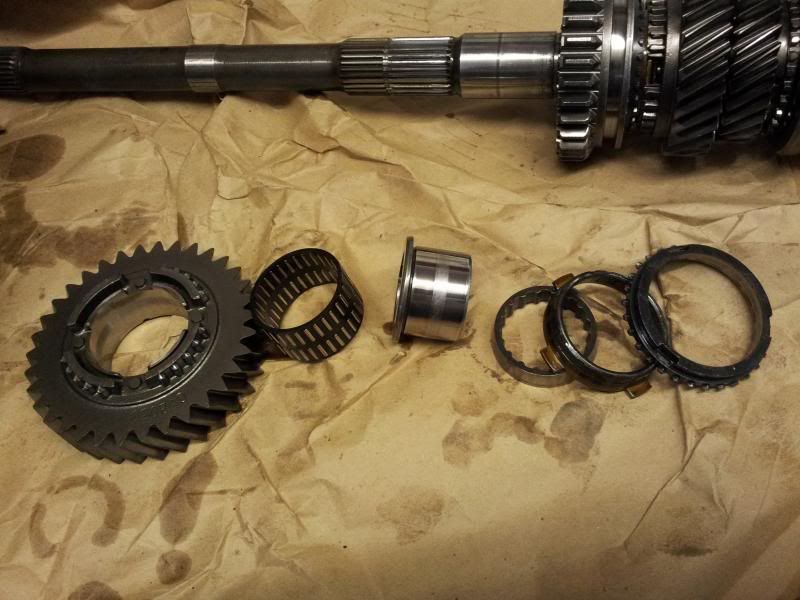 |
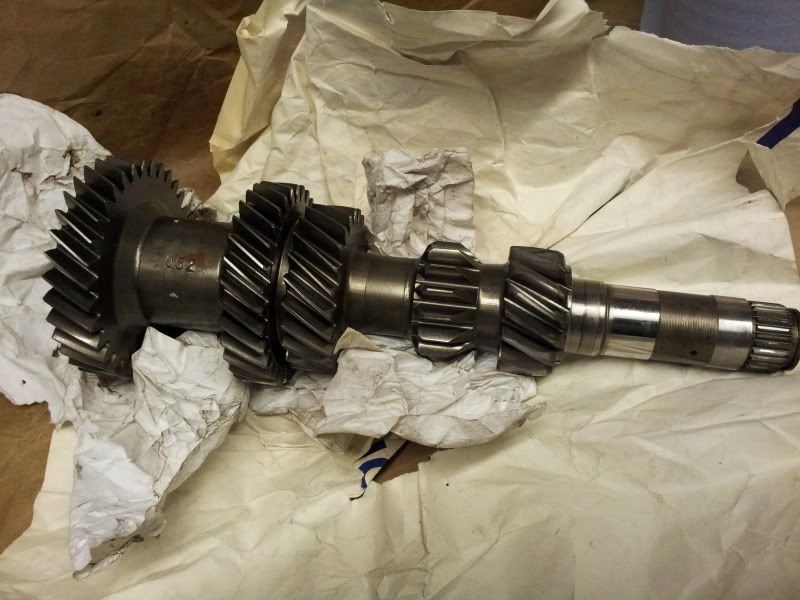
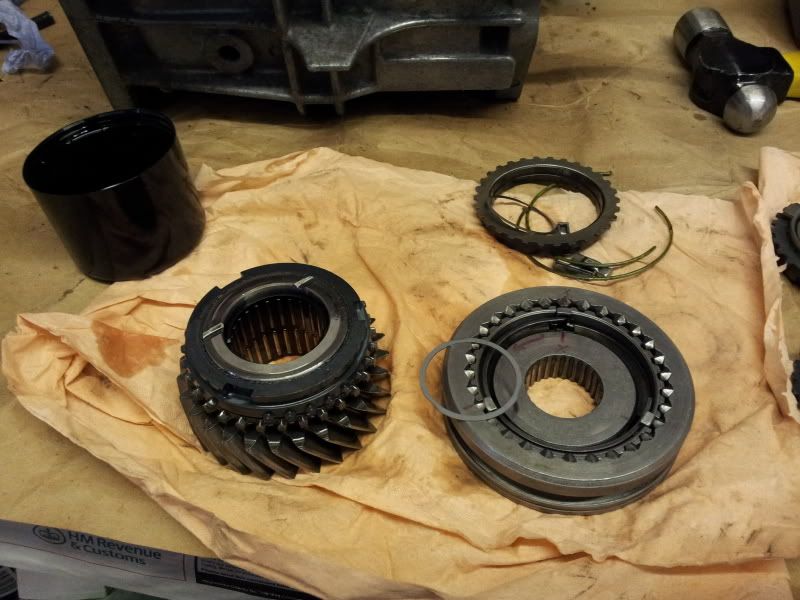
Above you can see the first operation for disassembling the output-shaft is to pull off the rear bearing and remove 1st gear, the needle roller bearing and sleeve along with the 3-piece 1st gear synchroniser assembly. This is followed by removing the 3rd-4th synchroniser assembly by pulling off 3rd gear, parts shown above.
Be sure to mark the relationship between the synchroniser hub and shaft, as well as the synchroniser hub and synchroniser sleeve before further disassembly.
** Further information added 24/12/2013 **
Phase 4 - Reassembly
Before reassembly, be sure to have the recommended "Dexron II" Automatic Transmission Fluid on-hand to pre-lube parts, as well as assembly lube/grease for needle roller bearings.
One thing is very important with reassembly, don't force anything. If something doesn't seem to fit right, double check it with the references you have to hand and the parts you removed. Take your time, keep everything clean and well lubed checking for any possible issues like binding and poor fitment as you go.
Again, here's another video from the guys at AutoRestoMod. If you want to skip the adverts, the good stuff starts at 01:55.
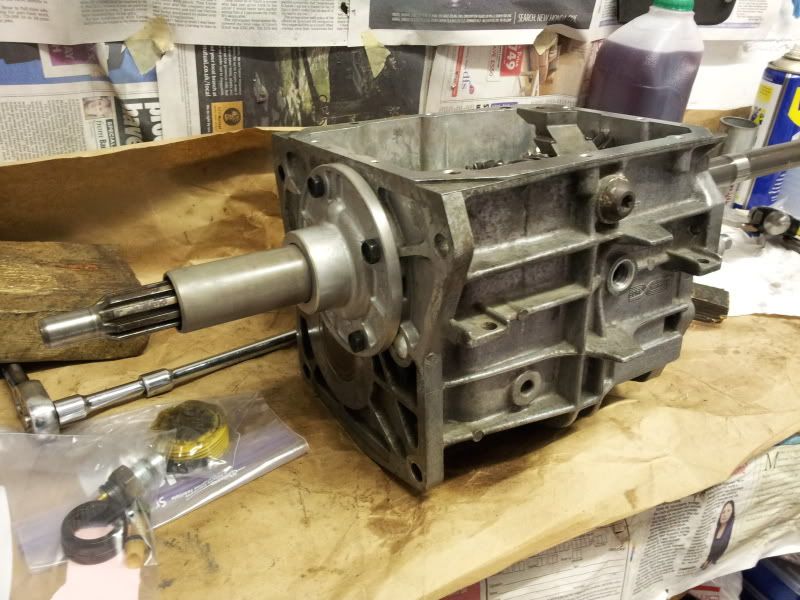
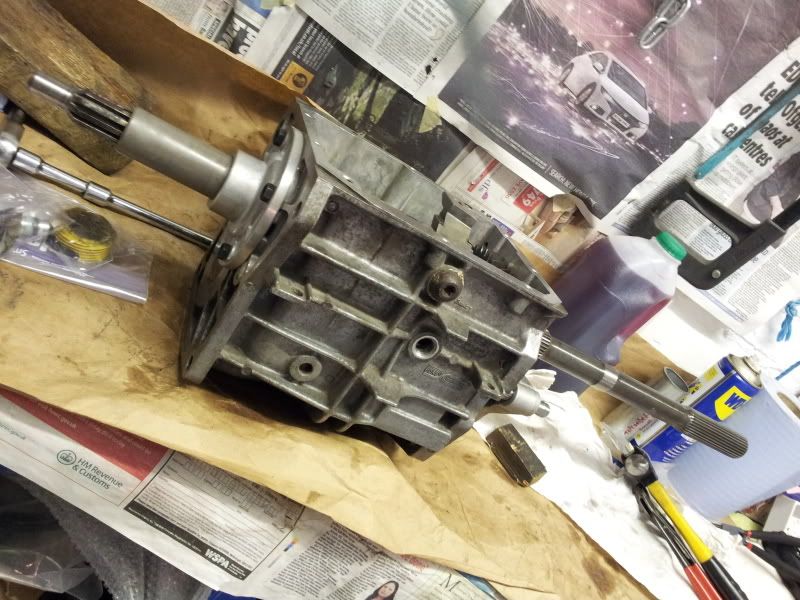
Here's a few pictures of the reassembly process on my World Class T5 Transmission.
 |
 |
 |
 |
 |
 |
 |
 |
Setting the counter-shaft end-play required some experimentation with relevant shims, but I quickly discovered that the original factory shim suited best so this was reinstalled. Note in the image above (above right) the lock-tabs have yet to be bent into position, as this photo was taken while checking the end-float of the counter-shaft was within specification.
Below are a few more progress photos, showing both the output shaft re-installed within the main case, the output shaft group (5th synchroniser, fork and gear) and finally the input shaft and bearing retainer.
 |
 |
 |
|
The rebuild is complete and ready to be installed into my 1968 Ford Mustang Fastback behind its small block Ford 302 V8.