

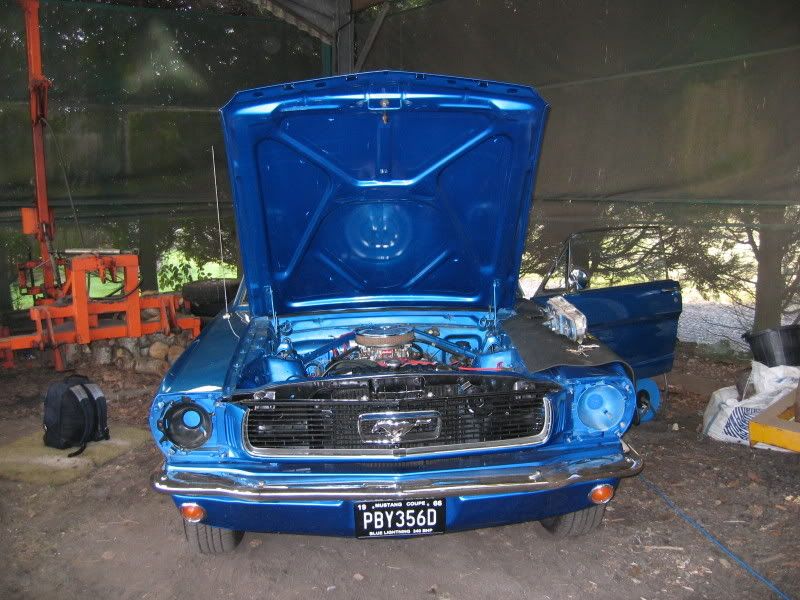
In 2008 after a while of cruising around in her nice modern 2005 Mustang GT, my wife George decided she wanted to enter the ranks of classic Mustang ownership. She spotted the blue 1966 Coupe shown below and instantly fell in love.
With a valid MOT certificate, the car already in the country and owned by a well respected member of the Mustang owners club, we thought it'd be the perfect car. While needing a little TLC, it should be a safe and solid car for her to drive. We took a chance and bought the car unseen (except for reviewing a large number of digital photographs) for a bargain price.
Looks great huh...? Well again looks proved be deceptive! * UPDATED - 28/09/2015 *

Below I've included some pictures from restoration work carried out on this car, please also bear in mind all this work is AFTER the photo above was taken. It's also worth holding in-mind that this car has a valid MOT and was fully road legal according to the paperwork, but I urge you to make your own judgement on that after reviewing the images below.
I hope you find this story interesting and another lesson of what NOT to do when looking to buy a classic Mustang!
- Matt
Inspection - Post delivery inspection and first impressions
This is where the story really begins. After the previous owner drove the car for 2 hours around the M25 (the busiest highway in the UK, which surrounds London) to our door, we got our first chance to look at the blue 1966 coupe George had just bought. It appeared as if we'd bought a "twenty footer", meaning that the car looked great from 20 feet away, but upon closer inspection of the paintwork things weren't so great.
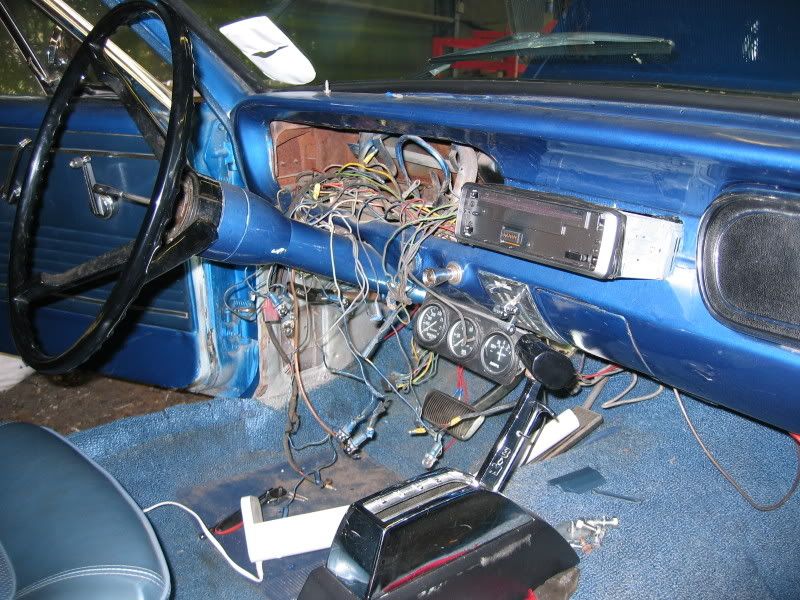
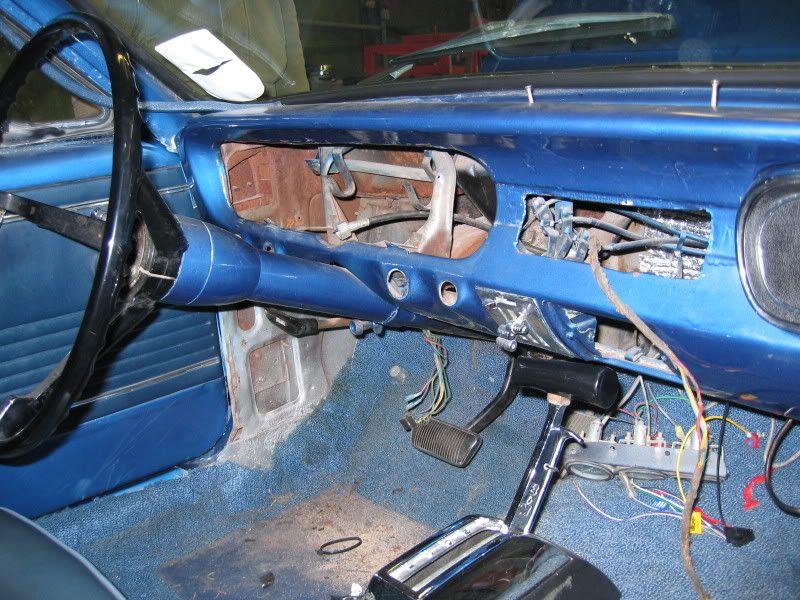
Not the end of the world, as after all this car was to be a driver and not a trailer queen. Moving into the interior things started to get progressively worse. The original dash had been "hacked" open to fit an aftermarket stereo, but it was so poorly done the entire stereo and supporting cage could be pushed right through the hole. It looked as if whoever cut the hole used a blunt spoon, because it was so uneven and rough, a 5 year old could have done a better job.
The whole dash and door-panels had been painted in the same blue as the bodywork, by someone holding a spray can 1" from the panel resulting in more runs than I previously thought possible.
Ok, take a breath...
It was decided to immediately take the car over to my workshop and dig a little deeper, just to be sure everything was safe and nothing was about to fall off or go catastrophically wrong. Upon turning the key, the car started easily enough, ran a bit rough but reasonable. Engaging reverse with the aftermarket ractchet shifter proved interesting, but jut car jerked and we were off. Driving didn't make things any easier, the carb had something wrong with it, or the ignition timing was seriously out because the car really stuggled. Then it started, mis-firing, cutting-out and picking back up... Oh no!
Fortunately we limped it there, parked it up and left it. Rather disgusted and more amazed how a chap drove such a poorly vehicle around the busiest motorway in the UK is still beyond me!
Electrical gemlins - Time for an exorcism!
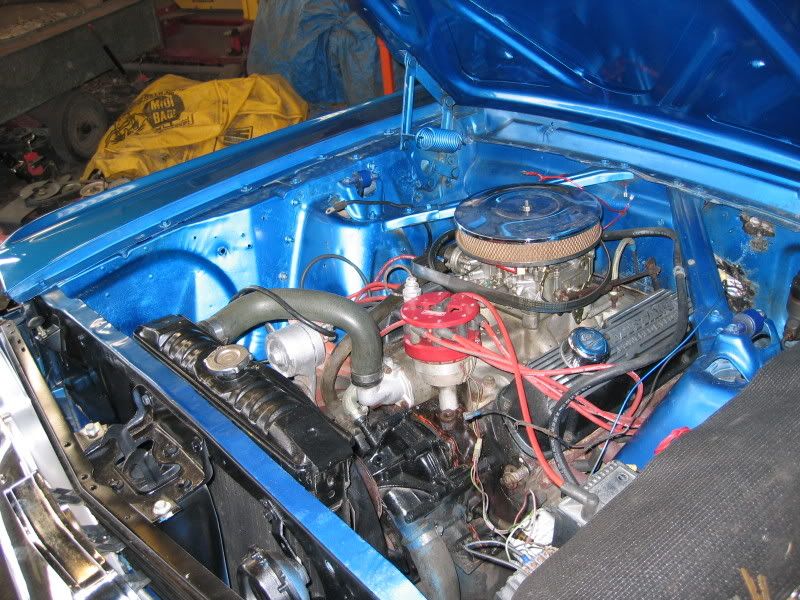
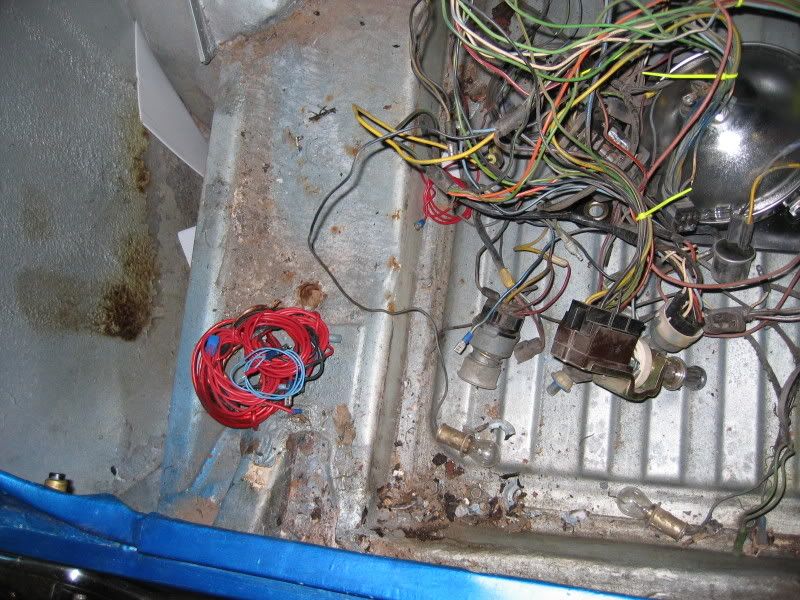
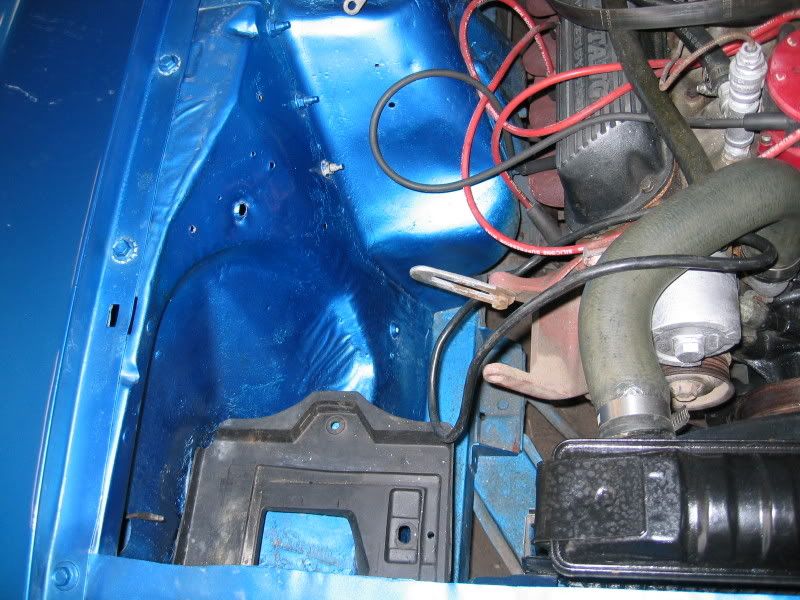
Upon closer inspection in the engine bay I discovered some of the causes for the gremlins almost immediately. The alternator was wired incorrectly, many wires had be cut, spliced and re-joined. Some were bare wire connections only twisted together, including those for the ignition circuits. The great aftermarket Mallory Distributor and HyFire multi-spark ignition system were connected up using household electrical wire and had twisted wire connections and then simply been taped up.
Unfortunately before I could do that, I knew that I'd have to resolve the running issues, trace the misfire and see what worked electrically and what didn't. I already knew that the indicators weren't legal because this being a 1966 car, in the UK it had to have amber turn signals but didn't!
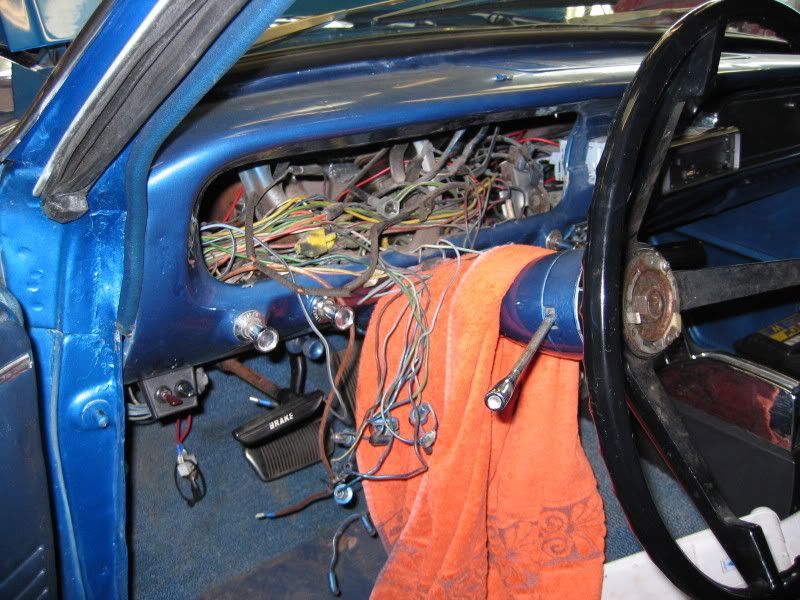
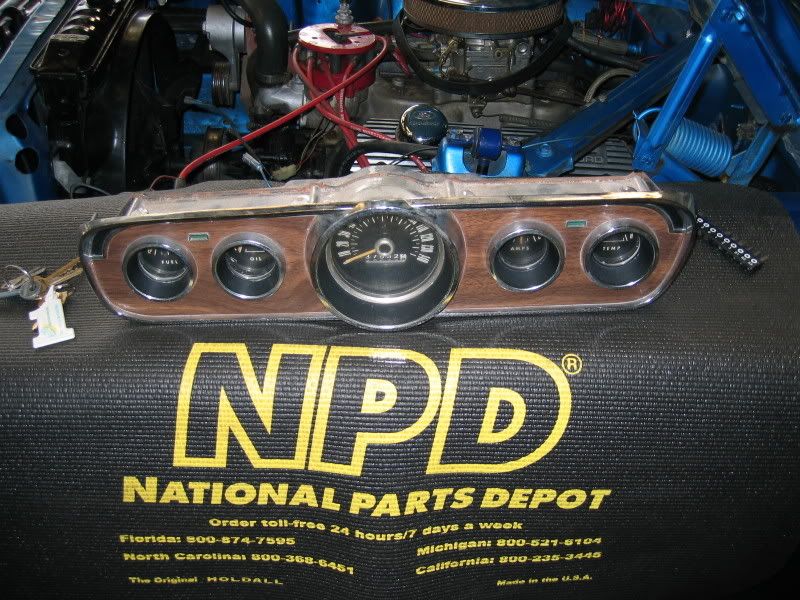
Take a look at some of the spaghetti I found under the dashboard in the pictures below. Obviosly the OE gauges weren't working, so they hacked the already ruined wiring loom up further to fit aftermarket gauges. What a joke!
 |
 |
 |
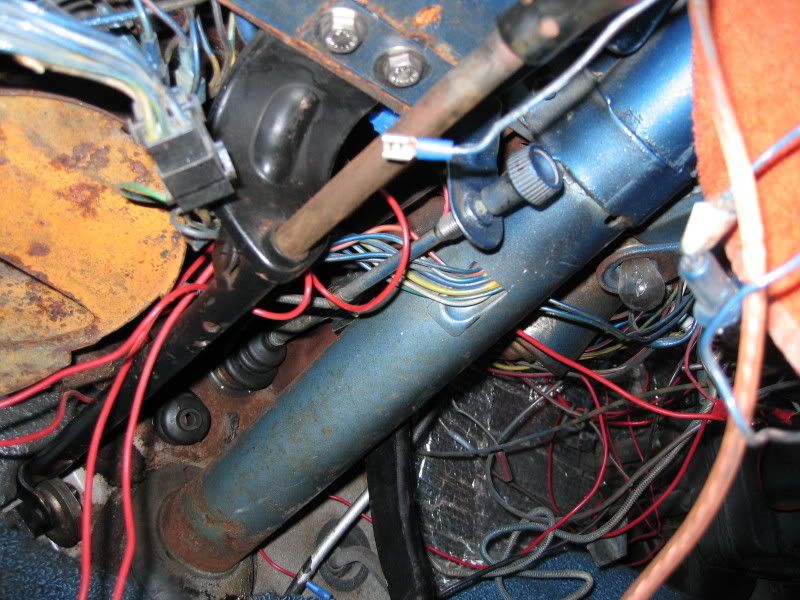 |
That was the last straw... I tore ALL of the wiring out, everything!
 |
 |
 |
 |
 |
 |
All of the wiring looms were replaced with new OE replacement units obtained from NPD in Florida.
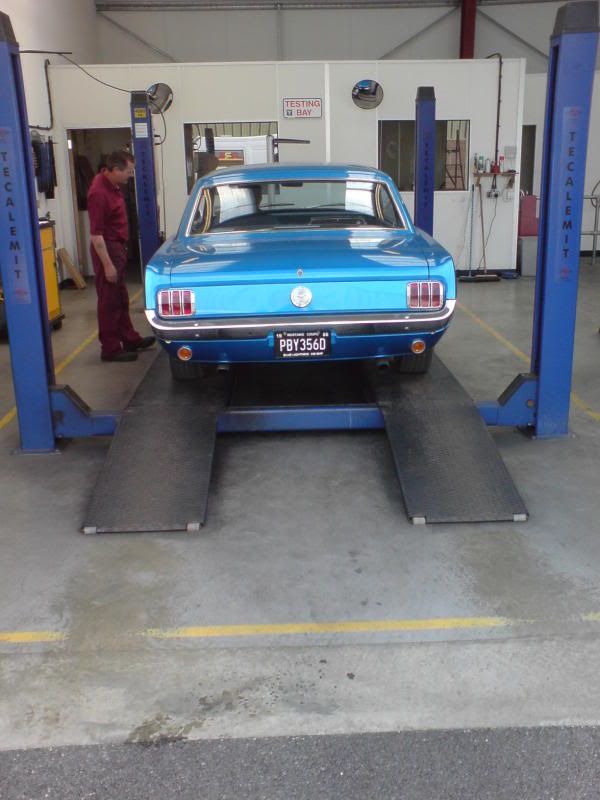
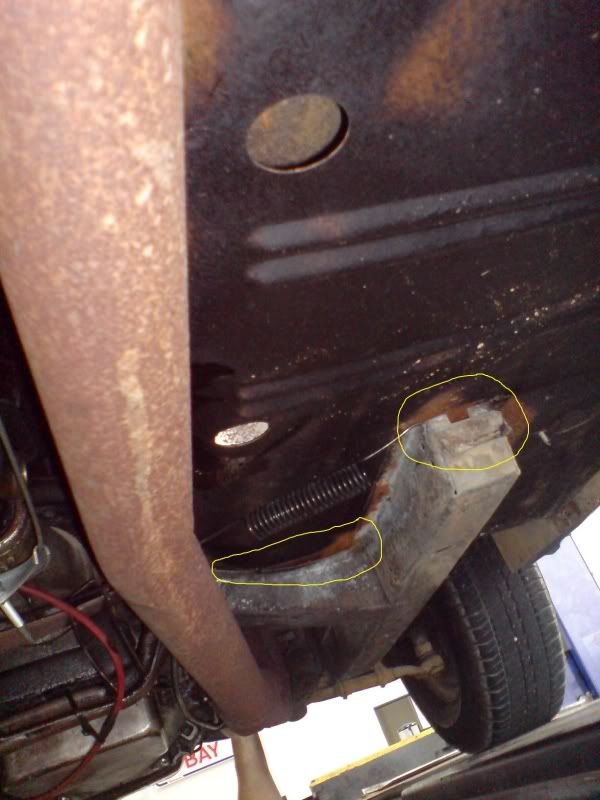
While addressing the electrical issues, I found some issues which raised questions in my mind as to the structural condition of the vehicle, so I decided all that could be done, was to book the car for a mock MOT test at a friendly local garage so I could go through it with the tester and see the real condition of the vehicle. Regardless of the fact it had a valid MOT, I wanted to know if it indeed was structurally safe and sound or not.
 |
 |
 |
|
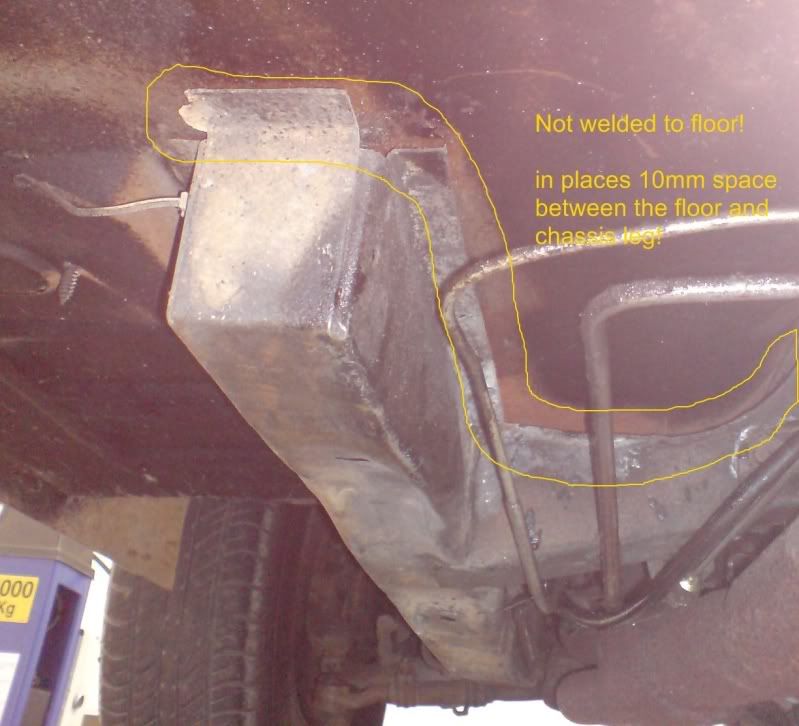
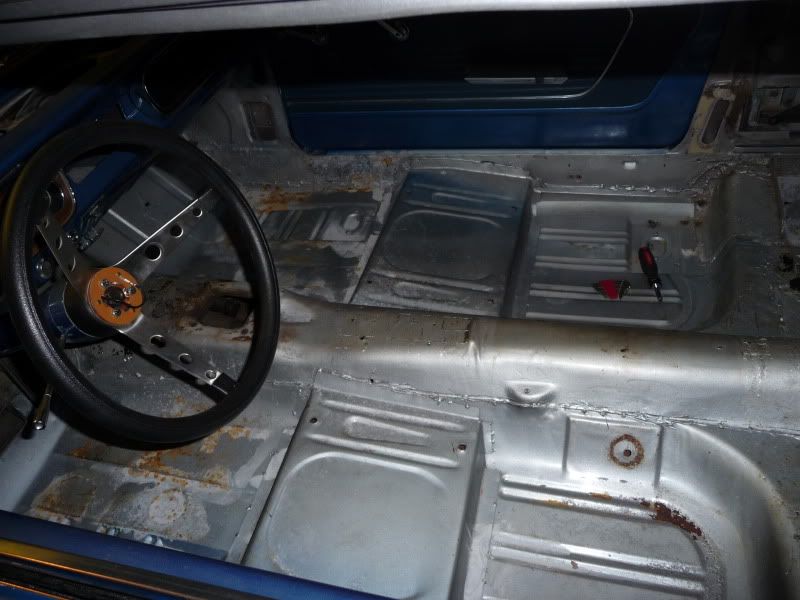
Utterly disgusted with what we found, the car was taken back to my workshop and immediately torn apart, removing every nut and bolt to ascertain what needed to be done. So much for buying a driver for my girlfriend, now I've got a whole host of welding to do. Remeber that lovely picture at the top of this web-page? That was BEFORE any remedial work you've seen on this page!
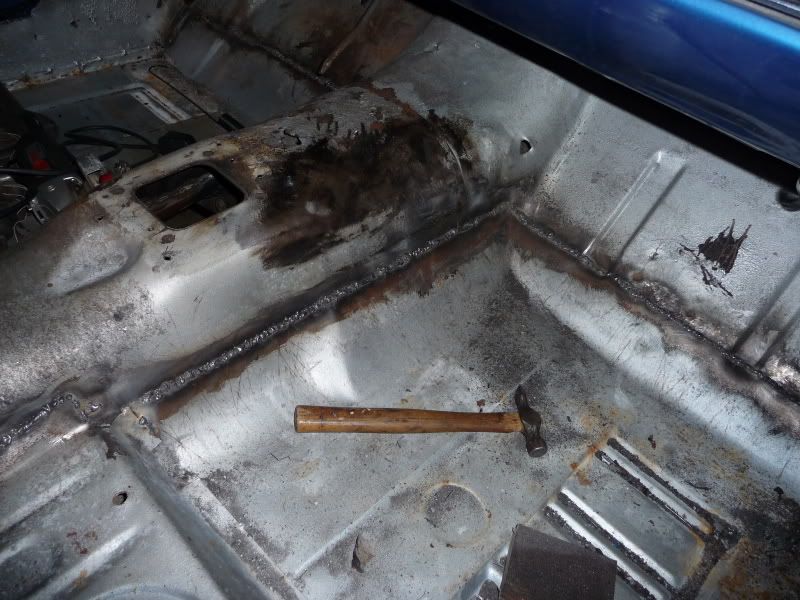
Both the passenger and driver floor pan halves had obviously been replaced in the USA, unfortunately whoever did the work failed to fit them properly. This just seems rediculous to me, why somebody would go to the effort to actually obtain repair panels only to do such s shoddy job of fitting/welding them into place. I had to cut/grind-off over two-hundred tack/spot welds in order to reposition the front floor pans and re-weld. On reflection it probably would have been far simpler and easier to replace the whole floor-pan.
 |
|
 |
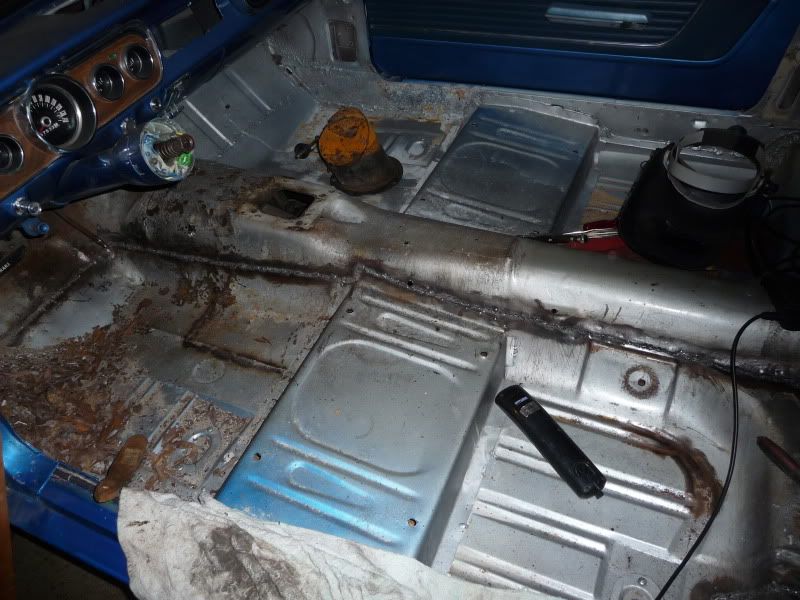 |
The images above really don't do justice how much work and effort was involved redoing this work. It looks like barely anything had been done, but took many weeks of evenings and weekends just to make good.
Now there's a solid floor, lets look at some of the other structural issues... Inner fender & front panel (core support).
 |
 |
 |
|
The inner fender had rotted-out, which is a common problem seen on many early Mustangs. Acid from the battery can leak out and prematurely corroded the steel underneath. Unfortunately instead of repairing it, someone riveted a piece of tin over the whole and filled it with fibreglass matting and body filler.
Similarly, the front panel had suffered the same fate, but to effect repairs it'd be easier to remove the front sheet metal and pull the engine. So that's what I did!
 |
 |
Sheet metal gone, now for the engine and transmission...
 |
 |
 |
 |
 |
 |
On a roll now, what's next? Fix the inner fender and front panel...
 |
 |
 |
Rip the front suspension off, then finish off the welding on the front end. weld-up numerous holes in the driver's side inner fender.
 |
 |
 |
 |
 |
 |
All prepped and ready for wiring, plumbing and suspension reassembly.
 |
 |
Dash repairs.
 |
 |
 |
 |
 |
 |
** Further information added, 23/12/2013 **
Completing the floor-pan repairs and painting.
 |
 |
 |
 |
The doors were chemically stripped to bare metal, degreased and then painted in satin blue to compliment the interior. While not a "factory correct" colour, I think it works pretty well and is in keeping with the theme.
 |
 |
 |
 |
 |
 |
The boot/trunk was given similar treatment to the rest of the interior.
 |
 |
Like the front sheet metal and wheel-arches, the whole underside of the car was stripped & cleaned, then sealed and coated with Wurth brushable seam-sealer and stoneguard.
 |
 |
 |
 |
The rear axle and suspension was obviously removed to complete the under-body protection and received a full clean and coat of paint along with rebuilt rear drum-brakes to connect to the entirely new braking system.
 |
 |
The late model 5.0 (302ci) engine was full stripped and rebuilt, as was the Ford C4 3-speed automatic transmission.
Unfortunately the transmission had seen better days having been very poorly maintained. It, like the late-model 302ci engine was also an incorrect match for the 1966 car, being based on a mid 1970s core. However, as this is to be a "driver" and not a trailer queen, it's of little consequence to us.
While some parts were salvageable; such as one of the drum which was skimmed to bring back into a usable condition, a host of new parts such as the front pump, torque converter and valve-body (with a TransGo shift improver kit) were all required to bring the tired old unit back to life.
More information is provided regarding the rebuild of the engine within another section of this website.
 |
 |
 |
 |